Movement basics
For a standing band row, the anchor is part of the exercise. Establish that it is suitable before deciding how far to stand away or how strongly to pull.
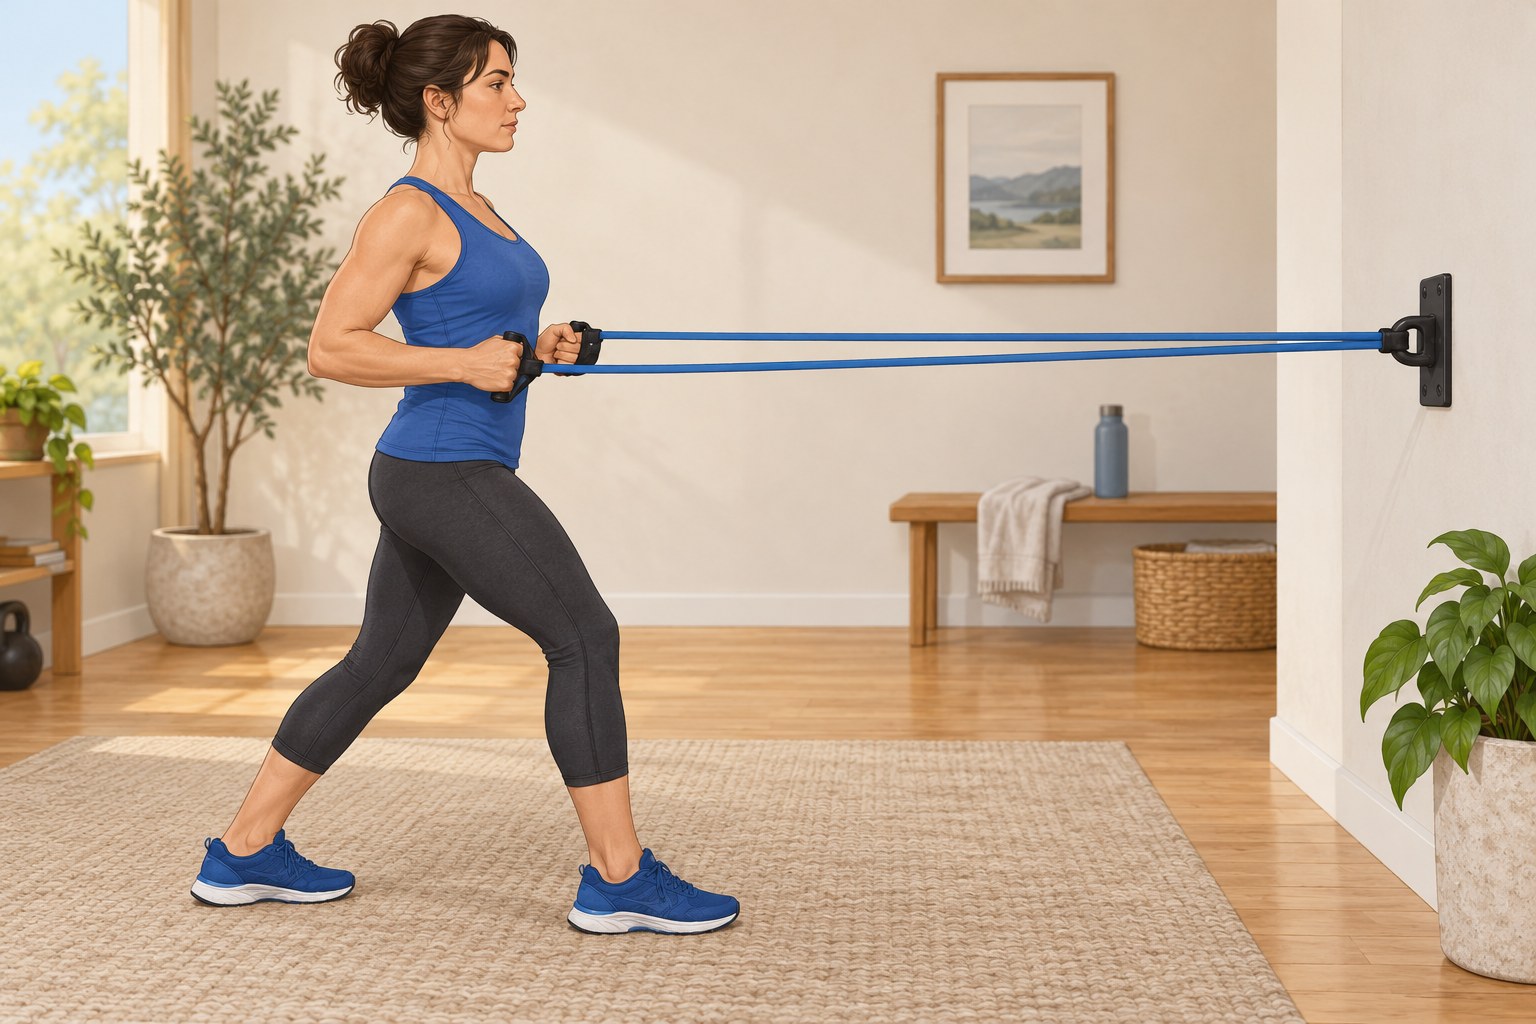
Follow the band's and anchor's instructions together. A purpose-made attachment still needs a suitable mounting point and correct installation. Do not loop a band around a door handle, a loose chair, a radiator or an object whose strength you cannot assess. If you cannot establish a reliable anchor, choose an exercise that does not need one.
A door anchor must be used only with the type of door, position and direction of pull specified by its manufacturer. Prevent anyone from opening the door during use. Do not assume that closing a door makes every improvised strap secure. In a studio, ask staff to check the attachment rather than moving it yourself to a more convenient position.
Inspect the whole system: band material, stitching, clips and handles. A small split or a connection that does not close properly is a reason to stop using it. Keep the line of the stretched band away from your face and from other people. The equipment can recoil if a component fails, so the surrounding space matters as well as the anchor.
Hold the handles or designated grip points with the arms in front of you, facing the anchor. Begin close enough that the band is only lightly tensioned. A staggered stance may feel steadier than placing both feet in one line, but choose the position that lets you remain upright without leaning backwards to resist the pull.
The anchor height determines the direction of the row. Use the height demonstrated for your exercise rather than improvising a high or low attachment and assuming the movement is unchanged. Ask the instructor to show where the hands should finish. A clear endpoint helps prevent pulling far beyond a comfortable range.
Draw the elbows back in a comfortable path near your sides, then let the arms move forward under control. Keep the wrists reasonably aligned with the forearms instead of curling the handles towards you. The torso should not swing backwards to start each pull or be pulled forwards as you return.
The band usually becomes harder to stretch near the end of the movement. If the last part requires a shrug, a backward lean or a sharp tug, reduce the tension or use a lighter band. Standing farther from the anchor is not simply a way to improve the exercise; it changes both the resistance and the available stretch.
Avoid releasing the handles while the band is stretched. At the end, move carefully towards the anchor to remove tension, maintaining control of the equipment, then put it down. This finishing step should be rehearsed before the main set so that fatigue does not leave you wondering how to stop.
Record the band, attachment height and approximate standing position. These details make a note such as light band row meaningful. A different brand's colour or a much longer starting distance can create a different load even when the exercise name stays the same.
If you are uncertain about the setup, ask for a supervised demonstration rather than experimenting with progressively stronger pulls. Pain, numbness or a feeling that the shoulder is unstable calls for stopping and appropriate advice. A standing row should be a controlled pulling task, not a test of whether a household fitting can withstand exercise equipment.